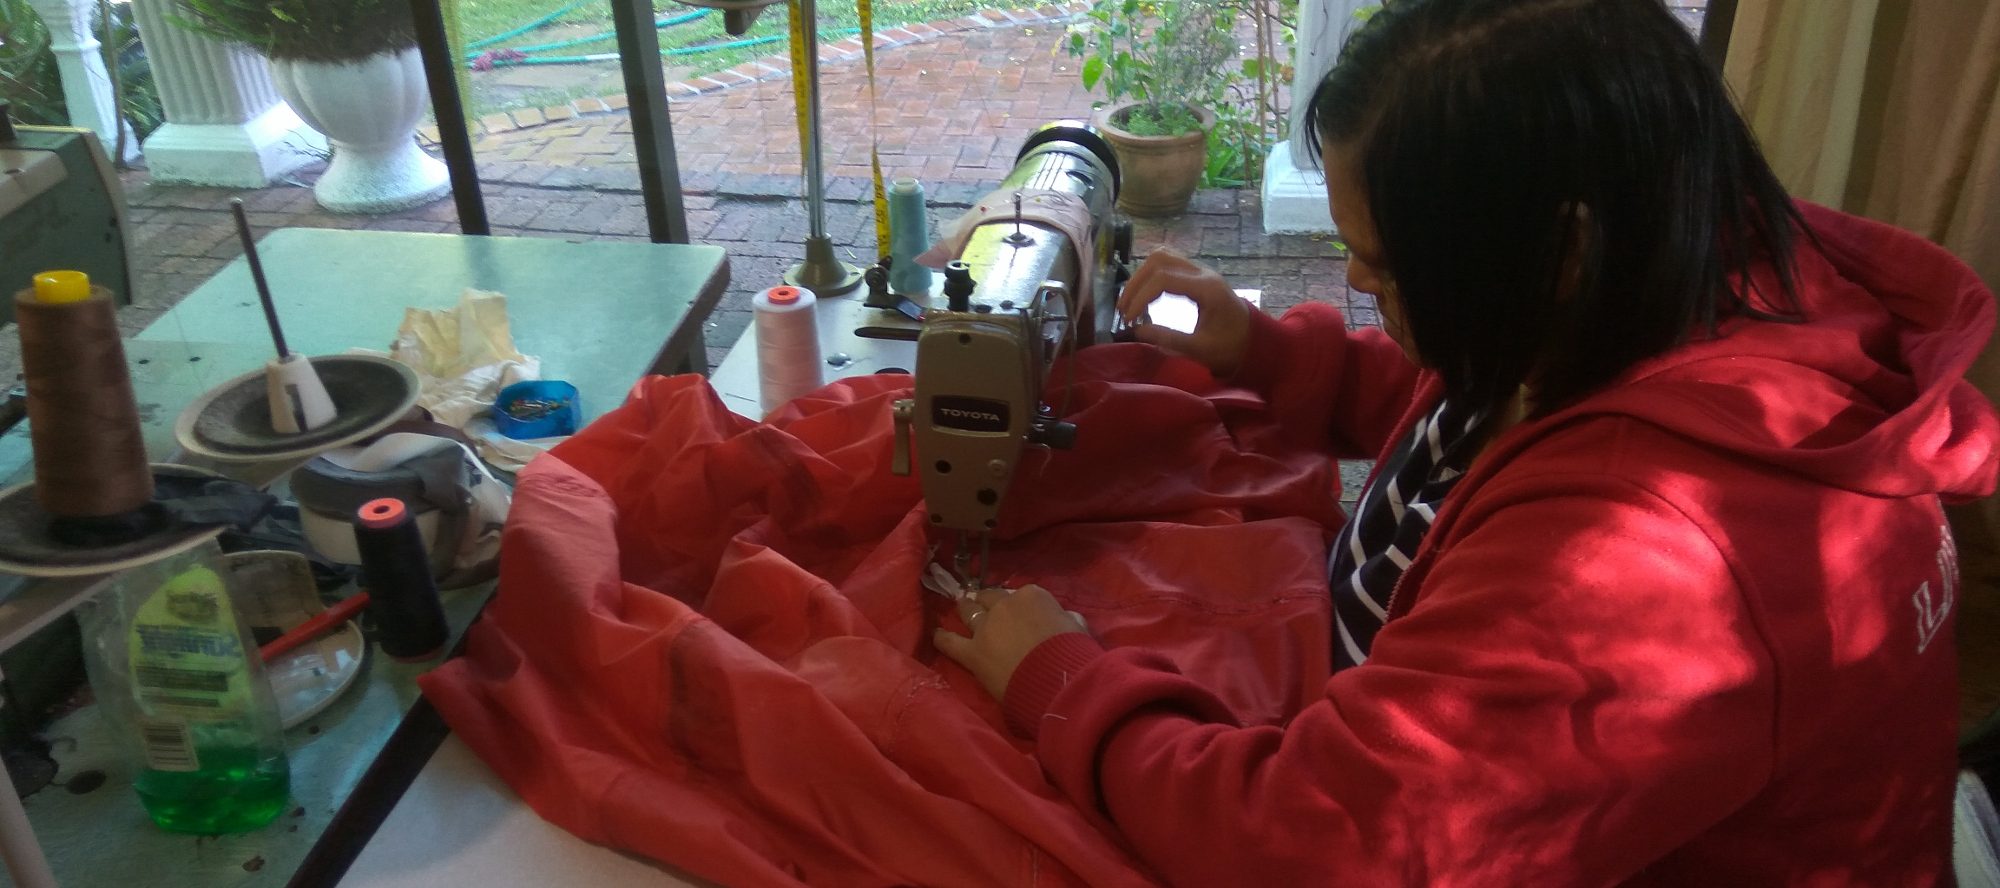
Today I woke up at 8am so that I could get to the seamstress by 8:30. When I arrived, I found that she had already hemmed down three of the twelve panels. I told her the new plan that my dad and I came up with the night before: instead of sewing the holding lines into the hemming, it would be cheaper and more efficient to rather make a little loop at the end of each seam, which we could then feed the holding lines though and splice them back on themselves which would be much stronger. This would also mean that we could do the lines ourselves and if they broke or there was a problem with them, it would be simple to fix.
Once I had explained the updated plan, she got to work. It took about an hour for all the panels and the top and bottom circle pieces to be hemmed, which to be honest was much faster than I thought it would be. During this time I tried to record some footage, but found that both cameras that I had brought had run out of battery, leaving me with only my phone camera. There was not much I could do about that, so I took a few photos and got working on the next thing. This was cutting the seam tape to the correct length and marking the ends of each line so that we would know where to place the panel on the seam tape, while keeping enough on the end for the loop. The seam tape is what would help hold the panels together. By sewing adjacent panels to the same piece of tape, it strengthens the join and also makes it easier for cross stitching, which was the second part of the parachute-making process.
Once the tape had been cut and the panels were hemmed, it was time to start joining them. This process involved taking two panels laying them next to each other on the seam tape and lining them up so that they matched the markings that I made earlier. Once this was done, the seamstress started sewing both pieces to the tape with a normal stitch. Once she was done, she took the now-joined panels to another machine which could do cross-stitching. The cross-stitching was useful for two reasons: firstly, it strengthened the binding of the two panels tenfold (actually that was made up, I don’t know how much it strengthened it, but I know it made a difference), and secondly it covered up the tape beneath it, so it looked a lot cleaner and more professional.
Once the process was finished, it was repeated until there were three sets of two panels, all joined and cross-stitched. The next process was joining each of the sets together, which would result in half a parachute. The process was the same as the first, but with just more material connected to itself. Once this was done, the seam tape used for the joining of each panel was pouring out the top, about the length of one of the panels. These carefully measured lengths enabled the third process to be started. This involved attaching individual panels to each of the opposite seam tape ends. There were 12 panels and I’d done half, so basically panels 1-6. Panel 7 would be sewn on opposite from panel 1 and panel 12 opposite from panel 6. Slowly up surely each of the panels were sewn on and the parachute was starting to come together.
About an hour and a half later, all the panels had been sewn together, but not all had been cross-stitched. The parachute was then passed on to another guy, called Gavin, who continued cross-stitching it. During this time I went outside and had a long thinking session about where my project was going and what I could do from here. I thought about the website that has still not gone live, if I would be able to afford a 360° camera and what I’d do with it, additional things to add to the website when it does actually go live, like writing short tutorials and making quick videos on what I’ve done and how to do stuff.
Once I had finished thinking I went back inside to see how the parachute was coming on. Gavin finished the cross-stitching as I walked in, which meant we could move on to the next stage. This involved making a button hole in the center of the circle piece, so that a little loop could fit through it, which is there so that we can hang the parachute from the balloon as it ascends. Once the button hole was made, the circle piece was sewn onto the top of the parachute, covering the small hole in the top and some of the top of the panels, which made it look so much better, neater and more professional. When this was done, the second circle piece was attached to the bottom side of the parachute, essentially sandwiching the top of the panels between the two circles.
It now looked like a parachute. I was really impressed and proud, as not less than 24 hours ago it had been an old flysheet for a tent, and now it was a proper parachute. However there was still one more step to be done. Each of the ends of the seam tape had to be folded back on itself and sewn to the hemming of the rim, so that they create a reinforced loop through which the holding lines could be pushed through. This process was swift and done in around 10 minutes.
It was finished. Well sort of. I still need to attach the holding lines, but the canopy itself had been made. I was really excited and looking forward to testing it and comparing it to the old parachute we had used from Intermet to see how it compared. When it came time for paying, Denise (the owner of The Cottage Shop), gave me a 50% discount as she was so taken with the project and wanted to help me as much as she could. This meant that the total cost of making the parachute came to around R330! R80 for the holding lines and the seam tape, nothing for the canvas material, as it was basically reused material, and R250 for putting it all together. I am extremely grateful for all the generosity I have received so far with this project, and I think I actually have a shot at turning it into something truly magnificent because of it.
Tomorrow I will be trying to catch up with all the journal writing and hopefully get around to keep working on my website, which I hope to get some kind of beta version up before school starts. I have yet to hear back from Michael about the use of internet at Intermet (😊) and whether or not we can use their tracking stations for a more effective tracking solution.


